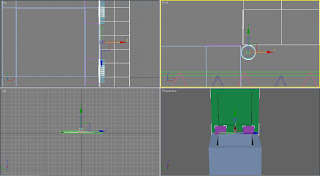
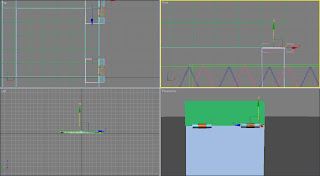
Monday, 30 March 2009

Week 9-More work on ident 3 part 6

I was pleased with how the start to this went last week, and now I have the logo I can do more work on this. To start I imported the logo into the scene.

Next I scaled it down to a size I was happy with. I wanted it to be quite large at the end of the ident, but not too big that the rest of the scene would be very small in the shot so the logo would fit in. Due to this I thought carefully when scaling the object.

I then used auto key to animate the logo appearing in the scene. To do this I scaled a very small version and placed it behind the robot and a larger version in front of the robot once all the letters had been written in stardust to give the illusion that it appeared from nothing. Lastly I added another particle system, this time which emits a puff of stardust when the logo appears.

Afterwards I created the lighting in the scene. Firstly I used an omni light to represent the sun and positioned it above the scene in the same position as previously used as an attempt to make the lighting consistent. I set the intensity to 1 and turned on the shadows. Then I added a target spot light and positioned it so it lit the robot which I set the intensity to 0.3.

I then rendered a still of the scene and felt the subject was lit too much as the reflection off the robots body made it difficult to see, and so decreased the intensity of the omni light to 0.6.

Next I added a camera so I could position the shot correctly. I was careful to make sure the robot was in the centre of the shot and not too small and also that when the logo appeared it was all in view of the camera. At this point I did find the spline letters were too far away as they were not in the cameras shot, so I moved the splines to a new position between the robot and camera and made them smaller with the scale tool to make sure they were all reachable by the character.

Next the bones were used to position the arm so it appeared the robot was holding the wand.

Afterwards I went on to animate the arm. The aim of this was for the outline of the spline letters to be followed with the wand so that it looks like the stardust is being created by the wand. To do this the auto key was used. Many key frames were added throughout the animation to try to get the smooth, fluid shape of the letters and it was quite time consuming to make sure the hand was kept ahead of the super-spray emitter.

Auto key was then used again, this time to align the wand to the hand throughout the movement. When doing this I was careful to keep the wand in the same position in the hand throughout to add the illusion that the robot was actually holding it.

Many alterations had to be made to the initial positioning of the key frames so that it was realistic and the wand was as close to the letters as possible. I did find that, despite I scaling the letters down before starting the animation, the robots arm was still not long enough to reach all of the letters, but I decided to leave it as it is because otherwise the splines would end up too small.

The last movement I added to the arm and wand was a forwards flick just before the logo appeared. This was quite easy to do, especially in comparison to writing the letters and feel it is subtle but still works well.

Next I went on to position the other arm. I changed the position of the bones so it looked like a natural, comfortable position. When I was happy I went on to look at the animation as a whole.

When I watched the animation I felt some things did not look quite right, one of these being the head. Currently he continually looked forwards and I thought it would look better if his eyes followed the movement of his arm. To do this I turned on auto key and used the rotate tool to make the head move from right to left.

I also thought alterations needed to be made to the final emission of stardust when the logo appears. Firstly I made sure I had applied the same settings which I used on the other super-sprays in the scene. Next I changed the emitter to emit as a firework as I felt this looked the most effective out of all the presets. Finally I added the gold material to the particle system.

I then watched the scene and felt the number of particles was too low in comparison to the other part of the scene and found increasing the rate to 300 resolved this.

I am happy with this part of the animation and so will now go on to work on another part of one of the idents.

Saturday, 28 March 2009

Week 9-Completing the logo

During last week I managed to build the logo, but run out of time and did not manage to add materials. Therefore this is where I will start this week.

I have decided that I will used a neutral colour so that it will fit into all scenes, but still stand out from the background. Therefore I will use a silvery white colour as I fill this will contrast from all scenes well.

Firstly I started by making a very reflective material. I selected the anisotropic shader and used a specular of 200, glossiness of 10 and anisotropy of 50. When I applied this to the letters I was not completely happy as it did not stand out properly and the inside blocks of the B merged with the outer area.

To solve this I created a second material. I selected the diffuse colour of black and selected the anisotropic shader. Next I set the specular level to 70, glossiness to 50 and anisotropy to 50. Then I selected areas of the extruded splines and applied the second material to them.

At this point I felt that the letters were not deep enough and so extruded the shapes further by 20 again.
Lastly I exported the logo. Now I have created the logo I will go on to add it to the final part of ident 3.

Thursday, 26 March 2009

Week 8-Creating the logo

Creating the logo now will allow me to complete ident 3 part 6, as well as all the other final parts of the first and second idents. Before I began I searched for the current logo on the internet. I then started to create the letters based on this.

Firstly I started with the first letter C. To create this I use a spline as I could not find a suitable font. I selected the line tool with the corner setting and drew out a shape I thought was proportional to the original. I created one of the letter Bs in the same way, just adding two squares to create the inner holes of the letter and grouped the shapes together.

Next I created the other two letters, this time using the text tool as one of the preset fonts as these were similar to the logo in the image I was working from. For the letter B I used Georgia font while for the letter C I used Calibri.

I then made each spline into an editable poly in turn, selected the polygon icon and extruded the splines to the amount of 10. I was not completely happy with the depth of the letters and so repeated the process by extruding it by 10 again.

Next week I will finish making the logo before I complete the last section of my third ident.

Week 8-Creating ident 3 part 6

To start this part of the ident I imported the ground, fence, robot and wand into a new file. I then scaled the robot and wand by setting the scale coordinates to make the objects the same proportion as in part 4. Finally I positioned the objects in the scene as I wanted them.

Next I went on to create the letter splines. I began by using the arc to create a letter C. Then I used the line tool to create the letter B. I did need to make some minor changes to the vertex points to perfect the shape of the letters. To complete the letters I cloned a copy of the C and B before spacing them evenly and scaling them down so they were proportional to the robot.

Afterwards I selected the super-spray particle system and set it to emit as a trail. I then added the particle system as a path constraint to the first letter spline. I then altered the settings by making the particle spread to 180, speed to 0.5 and fade time to 10.

I then repeated this for the other letter splines.

Next I moved the key frames of each path along the timeline so each letters stardust was emitted in turn.

The next step was to make the stardust material. I will be using the same setting as I did in part 4 of this ident as I was pleased with the colour I applied here. Therefore I created a gold material using the anisotropic shader with a specular level of 200, gloss level of 10 and anisotropy of 50. Lastly I applied it to each of the super-spray emitters.

I then watched the animation and found the start and end of the drawing of each letter was too close together and so made some more changes to the positioning of the key frames. I also changed the emitting times so each super-spray only produced sparks between the start and end key frames of the drawing of that letter.

Finally I increased the emit rate to 300 so it was more visible.

I feel the animation has gone well so far, but before I do any more work I will create the logo.

Tuesday, 24 March 2009

Week 8-Finishing ident 3 part 4

To start this week I looked again at what I had already done. I felt that the shape of the sparks still did not look right and so changed it back to one of the preset shapes.

I then went on to start to animate the arm, but before I started I positioned the arm so that it held the wand properly. To do this firstly I used the rotate tool to make the palm of the hand touch the wand. Then I used the move tool to reposition the bones and make the robot hold the wand.

Next I moved the arm so that the wand pointed at the start of the first spline. I then turned on set key and added key frames so the arm followed the shape of the splines in turn. To do this added a key frame at the start and end point of each spline animation. Next I added a key frame and repositioned the arm at each point between the start and end points where the hand did not align with the tip of the emitting point. I did find that I needed to edit one part of the arm and then the other to make the alignment. I did find this difficult as the arm did not stretch as far as I needed it to, however I tried to do it as well as I could.

As I have animated the arm the wand is no longer in place. Therefore I used the auto key to realign the wand to the hand throughout the animation. I needed to place several key frames along the timeline to keep the wand in place. I was careful not to let it move up and down the hand at any point.

Afterwards I watched the animation and was quite happy with the work I had done, but felt the motionless arm was too rigid and ruined the scene. So I bent the arm in a way I thought looked realistic.

I then animated the bones in the second arm using the auto key, all the time trying to get the arms in a balanced position. All the positions I set for the arms I made look as realistic as possible.

To finish the scene I next added lighting. Firstly I added an omni light with an intensity of 1 and with shadows on. I then positioned it in the same position in the sky as before in other parts of this ident.

I then added a target spot light to highlight the robot. I positioned it so that the light pointed at the robot and set the intensity to 0.1.

Lastly I added a camera. I selected a target camera and placed it in the scene so the robot was in the centre of the shot. I made sure that only the important parts of the animation was in the scene, this being the upper half of the robot and the stardust paths.

When I was happy with the cameras position I rendered the scene.

I am quite happy with this part of the ident, but if I have time I will try to make the wands movement and super-spray emitter’s line up better during the animation.

Week 8-Starting ident 3 part 4

I feel the ident has gone well so far and so I am going to continue to work on it for the rest of the week, but before I start animating this ident I must create the wand. For this I drew out a long, thin cylinder with a radius of 2.307 and height of 43.522. I increased the number of segments in length to 12.

I then created the materials for this in the material editor. For both the black and white I used the anisotropic shader. I wanted it to be a shiny, plastic like surface and so set the specular to 100, glossiness to 60 and anisotropy to 50.

Next I made the shape into an editable poly and chose the polygon icon. I then selected the polygons of the cylinder in groups and applied the different colours to the areas.

Finally I scaled the shape down to a more realistic scale before I exported it. When scaling the shape I reduced the radius more than the length as I felt that it was currently too short.

Next I went on to create the file ready for the animation and so imported the ground, fence and robot before scaling them until they were in proportion to one another. Then I imported the wand and scaled it down so it fitted into the robots hand well.

I then rescaled the timeline, setting it to 90 frames in length as I planned for this to last for 3 seconds in total.

Afterwards I drew out a spline with the line tool in the shape of the arc. I set the line drawing tool to smooth so that I would get a fluid shape once drawn. To get the line exactly as I wanted I edited some of the vertex points as an attempt to get it as smooth as possible.

Next I selected the super-spray particle system and placed it in the scene. I set the emit type to trail. Then I added this to the line as a path constraint.

When I played this it emitted and followed the line well, apart from the fact that it lasted for the whole of the timeline. To resolve this I moved the key frame from frame 90 to frame 30. This part was now how I had planned for it to be.

I then set it to only emit between frames 0 and 30 as well. I also made other alterations to the settings. Firstly I set the speed to 0.5, and left the variation at 20 and life at 15.

Afterwards I created a hedra as I felt it would be a really good shape to be emitted. I started by drawing it out and applying a gold material to it. For this material I used the anisotropic shader and made the specular level 200 and glossiness as 10.

Lastly I set it to be emitted from the particle system.
I then repeated this process with two new, different shaped lines. The first was a straight, diagonal line while the other was a wiggly line. I applied a different super-spray emitter to each. Finally I set each motion path to play through different sets of 30 frames.
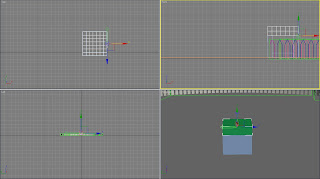
Next I rendered the animation, but felt it was not right. Firstly I felt there were not enough shapes being emitted and so increased the rate to 300. Also, I moved the start and end points for each motion path together so that there were a few frames gap between the start and finish of each. I increased the spray spread to 180 and reduced the particle size to 0.5. Finally I made it fade for 10.

These changes made the animation section much better, but it is still not perfect. I will continue to work on this during the week and hopefully get it to a point I am happy with.

Week 8-Experimenting in 3Ds max

In the rest of the animations for this ident I have planned for stardust to be included. I am currently not sure how I will do this so I have decided try out possible methods.

To start I thought about using the reactor tool. For this I drew a sphere and gave it a very small mass to try to make it drop at a slower rate. When I created the animation I set it to make an object drop at different points along the timeline so that they dropped at regular intervals. This would probably work with a lot of patience, but I doubt if I would have the time to do this. Therefore I will try to find a different method.

I researched possible methods for doing this and found that a glow could be added to an object. However, I did feel that this would be no use unless I could get the object to move how I imagine stardust to move.

Lastly I looked through the create menu and found particle systems. I tried different ones of these out and found that if I selected super-spray and set it to emit in a trail. I am really pleased with this and feel it is the best option out of everything I tried, therefore will use this when creating these parts in ident 3.

Monday, 23 March 2009

Week 8-Continuing with ident 3 part 1

Now the box has been created I can start to animate this part. To begin I opened the file where I built the box and imported the robot. Next I scaled the body down so it was proportional to the rest of the scene. So that the objects were the same scale throughout the idents I set the scale coordinates as they were for as in part 2.

Next I imported the bag and Ted and scaled then so they were proportional to the parts already in the scene. This took some time as I had to make sure the bag was still big enough to fit the bear in. To help the bear fit in without it being too small and obviously a different scale from the other idents I used the bones to position the legs and arms.

I then grouped the robot, bear and bag before placing them in front of the box.

Afterwards I decided to add the materials to the box as I had forgotten to do this while making it. For the main part of the box I wanted to give the impression it is made of wood so selected the wood preset which I felt was most suitable. For the hinges I wanted to create a metal material and so used the anisotropic shader.

Next I added lighting to the scene. Firstly I selected an omni light and placed it in the sky to act as the sun. I set the intensity of this light to 1. To highlight the subject in the scene I used a target spot light and targeted it at the robot. I changed the intensity for this to 0.3 as I wanted the sun to act as the main light. For both of these lights I turned the shadow on.

The next step was to rescale the timeline to 30 frames in length as this part of the animation will only be one second long.

Afterwards I went on to animate the scene. Firstly I got the box lid to open and did this using the auto key. Once selected I moved to the last frame and rotated the lid upwards.

I was pleased with the lid opening and so added the camera to the scene. When planning this animation I wanted the ident to begin from darkness inside the box and gradually see more of the scene when the box is opened. I chose to use a target camera as the camera does not need to move. Then I positioned the camera inside the box. I found this quite difficult as I struggled to get the target of the shot correct.

I was unable to solve this problem by just moving the camera, and so decided to try the shot with the robot kneeling. To do this I used the bones to create a bend at the knee so the leg was at right angles. So that the feet did not disappear into the ground I also repositioned these.

I then made some slight alterations to the camera position and the shot was how I wanted it.

I was happy with the animation so far so decided to go on to create the robots arm movements. Firstly I positioned his left arm and placed it on the side of the box so it appeared he was holding it still. Next at the first frame of animation I positioned the right arm on top of the box. Then I took each bone one by one and used the auto key and repositioned them at frame 30. In previous animations this semester I found it was easier to animate the limbs closer to the body first so used this method again.

When I watched the animation I found that the hand slid across the box as it opened and so I had to make some slight alterations to the positioning of the bones. I found it very difficult to keep the hand still throughout and there is still some slight movement which I am disappointed with.

Next I rendered one frame in the scene.

I feel the lighting is not suitable as too much of the subject is in shadow. Due to this I repositioned the spot light so it highlighted the majority of the subject.

Next I went on to render the scene. When I watched it I was disappointed that the material inside the box could be seen from the beginning, even though there was no light inside.

I tried lighting inside the box with a low intensity to try to make it all in shadow. For this I selected an omni light as it would light the whole of the inside of the box evenly. I set the intensity to 0.1 so it was quite dark and turned on the shadow. This worked much better.

Finally I turned off the omni light in the sky as since the addition of the new light the robot is lit slightly too much. I felt the other lights were the most important and so this is why I selected to turn this one off.

I am quite pleased with this part of the animation and so I will go on to another part.

Week 8-Starting ident 3 part 1

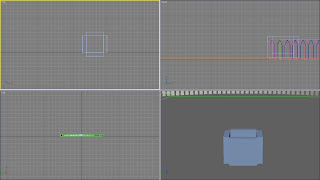
To begin I imported the ground and fence into a new file. I then realised that I had not created the box needed to complete this ident and went on to create that.

To start the box I created a box with a width and length of 50 and height of 10. I then cloned 4 copies and arranged them to create a box shape.

At this point I found the sides of the box did not align properly and so increased their widths to 70.

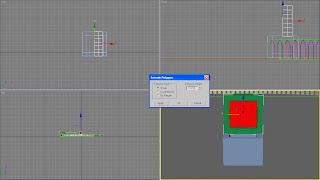
Afterwards I drew out another box, this time for the lid with a length and width to 70 and the height to 21.748. Then I made it into an editable poly and clicked on the polygon icon. Afterwards I selected all the middle polygons on the underside, opened the extrude window and extruded it to a negative value to create an indent.

When I was happy with the lids appearance I aligned it with the boxes underneath. I then changed the pivot point and placed it at the back of the lid. This allowed it to open like it was hinged at one point.

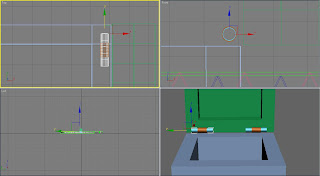
Next I went on to create the hinges. To start I created a cylinder with the radius of 2.103 and length of 7.158. Next I created a second cylinder, this time slightly narrower so that it appeared to be the inside part of the hinge. For this cylinder I set the radius to 1.845 and length to 16.713. I then aligned the thinner hinge in the centre of the first cylinder before cloning the shapes and putting them in place on the box.

At this point I realised the hinges must go on the outside, otherwise the lid would not be able to close.

Afterwards I went on to create the section of the hinge which will attach the cylinders to the box. For this I used a box with a length of 9.932, width of 16.945 and length of 0.37. When I was happy with the shape I cloned 3 copies and arranged them either side of the hinges, making sure they touch the boxes.

Next I decided to group these objects ready to animate the lid opening. Firstly I selected the lid, two boxes touching it and the shorter cylinder. The second group included the five boxes which created the bottom half of the box, the longer part of hinge and the hinge attachment which touches this area.

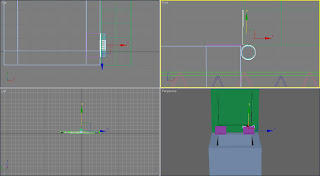
I then altered the position of the pivot point for the lid group to the back of the box. I tried to make sure that the pivot point was in the middle of the hinge cylinder so that it would open like a real box.

Then I used the rotate tool to see how the lid opening went. I was quite disappointed as when I closed the lid it intersected the bottom boxes. I then realised that I should have positioned the hinges with the lid shut and placed them in the exact middle of the lid and box shutting point. When I tried opening and shutting the lid again it worked well and so decided to continue with the next part.

Finally I scaled the box down so that it was proportional to the rest of the scene.

The building of the box is now complete. Next time I will continue to work on the scene and hopefully complete the animation.