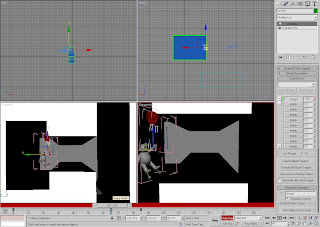
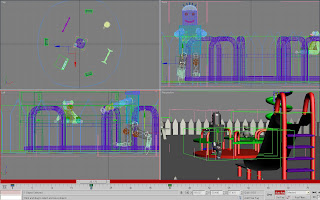
 Next I applied a morph modifier to the original string and put the new, modified shape into one of the channels. Afterwards I applied different morphing values along the timeline using auto key to make the string taunt when the bear was hanging and lax when he was not.
Saturday, 25 April 2009
Week 10-Improving ident 2 part 6
As the adaptation to the string went well previously I feel it is necessary to incorporate it into this section as well. So, I made the sting into an editable poly, cloned a copy and made alterations to the shape.
 Next I applied a morph modifier to the original string and put the new, modified shape into one of the channels. Afterwards I applied different morphing values along the timeline using auto key to make the string taunt when the bear was hanging and lax when he was not.
 Next I applied a morph modifier to the original string and put the new, modified shape into one of the channels. Afterwards I applied different morphing values along the timeline using auto key to make the string taunt when the bear was hanging and lax when he was not.
Week 10-Adapting ident 2 part 3
Currently I felt ident 2 part 3 worked reasonably well, however the walk sequence was too fast. So to start I rescaled the timeline from 90 frames length to 105 to prevent this.
Next I went on to create the tug of the string as this would add realism to the balloon making the character float as it suggested the bear had a mass. To do this I cloned a copy of the balloon string and edited it using the soft selection tool.
 I am now much happier with this section, especially as the walk sequence is no longer at a great speed.
Next I went on to create the tug of the string as this would add realism to the balloon making the character float as it suggested the bear had a mass. To do this I cloned a copy of the balloon string and edited it using the soft selection tool.
 Then I selected the original and applied the morph modifier. Then, during the timeline I apply the morph at different percentages.
 I am now much happier with this section, especially as the walk sequence is no longer at a great speed.
Monday, 20 April 2009
Easter-Changes to ident 2 part 6
I now feel this part of the ident needs some more alterations as I have learnt more since completing this. I do think it is not obvious that the balloon deflates. So, I turned on the auto key and used the scale tool to aid this.
 Lastly I decided to add a cloud as I felt this would be a nice effect. To do this I used the same process as before and placed it in the bears rising path as I thought it would look effective if the view of the bear became slightly obscured.
I did find I needed to try different values to get the density of the cloud correct so I could see as much of the bear as I wanted.
Saturday, 18 April 2009
Easter-Changes to ident 2 part 4
There are several areas of this ident which I am not happy with and so I will attempt to improve these areas to an acceptable level. I felt the movement of the ground was not quite right as the grass did not appear to move at the same pace as the other objects. I therefore grouped all the elements on the ground and redid the movement using auto key.
 Afterwards I went on to redo the bear as whilst working on this part of the ident last time parts of his body became deformed. To resolve this I merged the bear again and scaled it to the same size as the original bear. I then used the bones to make the bear in the same position as before.
 When I was happy with the bears positioning I deleted the original and attached the new bear to the balloon so it was also animated.
The animation was good at this point, but I still felt it needed more. So, I decided to try to add clouds as I felt this would really help to show how high the bear was as well as add realism. I did not know how to do this and so researched creating clouds in smax on the internet. I found a good tutorial at http://library.creativecow.net/articles/lacle-greg/clouds.php.
I then tried to make a cloud in my scene. To do this I firstly drew out a box gismo in the scene. I made sure it covered the whole of the ground area as I did not want the edge of the cloud to be evident during the animation.
 Afterwards I went on to redo the bear as whilst working on this part of the ident last time parts of his body became deformed. To resolve this I merged the bear again and scaled it to the same size as the original bear. I then used the bones to make the bear in the same position as before.
 When I was happy with the bears positioning I deleted the original and attached the new bear to the balloon so it was also animated.
 The animation was good at this point, but I still felt it needed more. So, I decided to try to add clouds as I felt this would really help to show how high the bear was as well as add realism. I did not know how to do this and so researched creating clouds in smax on the internet. I found a good tutorial at http://library.creativecow.net/articles/lacle-greg/clouds.php.
I then tried to make a cloud in my scene. To do this I firstly drew out a box gismo in the scene. I made sure it covered the whole of the ground area as I did not want the edge of the cloud to be evident during the animation.
Friday, 17 April 2009
Easter-Changes to ident 3 part 6
I am reasonably pleased with this part so far but feel it could be improved slightly. Therefore I am going to make some alterations, firstly to the stardust.
I felt the burst of particles at the end were not that visible and decided they needed to be a bolder part of the scene to emphasize the theme of magic. For this I increased the particle rate to 500, but made it stop emitting at frame 120 leaving a 1 second for the particles to disperse to prevent the screen from becoming full and so the logo would be able to be seen.
 Also, I made the stardust shoot towards the camera. To do this I changed the particle formation values of off axis to 10 with a spread of 10 and the off plane value to 0 with a spread of 180.
 Afterwards I imported the hat into the scene before scaling it down so it was proportional to the rest of the content and then positioning it above the robots head. I then grouped it with the robots head so that they turned from side to side together.
 The final alteration I made to this part of the ident was to make alterations to the lighting. I felt it was necessary to change the setting of the spot light as currently there was a ring of light clearly evident around the character. To resolve this I turned on far attenuation and set the start value to 80 and end value to 250. The area around the robot is still slightly lighter than the rest of the scene, however this is hardly visible. Despite altering the setting further I was unable to remove this without affecting the lighting level on the character and so will leave it as it is.
I felt the burst of particles at the end were not that visible and decided they needed to be a bolder part of the scene to emphasize the theme of magic. For this I increased the particle rate to 500, but made it stop emitting at frame 120 leaving a 1 second for the particles to disperse to prevent the screen from becoming full and so the logo would be able to be seen.
 Also, I made the stardust shoot towards the camera. To do this I changed the particle formation values of off axis to 10 with a spread of 10 and the off plane value to 0 with a spread of 180.
 Afterwards I imported the hat into the scene before scaling it down so it was proportional to the rest of the content and then positioning it above the robots head. I then grouped it with the robots head so that they turned from side to side together.
 The final alteration I made to this part of the ident was to make alterations to the lighting. I felt it was necessary to change the setting of the spot light as currently there was a ring of light clearly evident around the character. To resolve this I turned on far attenuation and set the start value to 80 and end value to 250. The area around the robot is still slightly lighter than the rest of the scene, however this is hardly visible. Despite altering the setting further I was unable to remove this without affecting the lighting level on the character and so will leave it as it is.
Easter-Improving ident 3 part 5
Since last looking at this ident I have noticed that its appearance is not quite how I had initially planned. Firstly I imported the hat into the scene.
Once in the scene I set the scale coordinates so that it was proportional to the other parts of the scene and of the same proportions as the other parts of the ident. When the right size I placed it on the robots head.
 I then repeated this process by importing the object again and scaling it so it was in the same proportions to the bear’s hat as in previous parts. I added the hat to the bear’s grouped body so that when he grows during the animation the hats size increases as well.
 Next I made changes to the zaps of startdust which came out of the wand as these were not as visible as I wanted them to be after the animation was rendered. For this I increased the particle rate to 600 for each of the zap sections.
Once in the scene I set the scale coordinates so that it was proportional to the other parts of the scene and of the same proportions as the other parts of the ident. When the right size I placed it on the robots head.
 I then repeated this process by importing the object again and scaling it so it was in the same proportions to the bear’s hat as in previous parts. I added the hat to the bear’s grouped body so that when he grows during the animation the hats size increases as well.
 Next I made changes to the zaps of startdust which came out of the wand as these were not as visible as I wanted them to be after the animation was rendered. For this I increased the particle rate to 600 for each of the zap sections.
Tuesday, 14 April 2009
Easter-Adaptions to ident 3 part 4
From looking at what I had done so far I felt it needed more work to make it as good as other parts of the idents. Firstly I felt it looked unrealistic as the robots head remained stationary throughout. Therefore I animated the head using auto key and the rotate tool so it moved as it did in other parts of this ident. I was careful to make sure his eyes were looking at his hand and wand as it drew in the air
 I then selected each spline which acts as a path in turn and edited the vertex points to align the tip of the wand with the place where particles are being emitted from. I decided to edit the splines as I felt it would be easier that editing the arm and wand movements.
 At this point I realised that there was no wizards hat in the scene and so imported it into the scene and scaled it down so that by setting the coordinates it was proportional to the rest of this ident. I then positioned it on his head.
 When I watched the animation the hat remained stationary while the head turned from side to side and looked quite unrealistic. So I grouped the hat with the head so the two rotated together.
 I then selected each spline which acts as a path in turn and edited the vertex points to align the tip of the wand with the place where particles are being emitted from. I decided to edit the splines as I felt it would be easier that editing the arm and wand movements.
 At this point I realised that there was no wizards hat in the scene and so imported it into the scene and scaled it down so that by setting the coordinates it was proportional to the rest of this ident. I then positioned it on his head.
 When I watched the animation the hat remained stationary while the head turned from side to side and looked quite unrealistic. So I grouped the hat with the head so the two rotated together.
The last step was to edit the lighting to remove the sheen on the robots body which makes the screen difficult to see. I used the light lister to change the intensity value and check the shadows were being applied from the correct light sources.
Easter-Improving ident 1 part 5
Easter-Adaptions to ident 1 part 3
As with part 2 of this ident, alterations need to be made to get a fluid transition between the two. For this I began by applying a linear tangent to the first key frame to remove the preset ease in and an ease out at the end so the roundabout slowed down as the bear flew away.
 When I then watched the animation I found that the bear slipped around on the seat now as he moved. Therefore I used auto key to try to keep the bear in the same position on the seat as the roundabout rotated. I was unable to keep it completely steady, but I felt this added to the scene as it appeared that the increasing momentum was getting him to move before he flies off.
 When I then watched the animation I found that the bear slipped around on the seat now as he moved. Therefore I used auto key to try to keep the bear in the same position on the seat as the roundabout rotated. I was unable to keep it completely steady, but I felt this added to the scene as it appeared that the increasing momentum was getting him to move before he flies off.
Sunday, 12 April 2009
Easter-Improvements to ident 1 part 2
When I watched all part of ident 1 together I noticed that the roundabouts movement sped up and slowed at the start and end of each section. Parts 2 and 3 were designed to be a follow on of each other without the viewer noticing, but currently the seam was evident.
To resolve this, the curve editor was opened and the end tangent was set to linear so that the rotation of the roundabout no longer eased out. I decided against making this adaptation to the beginning tangent as I felt the ease in worked well as it gave the impression that the roundabout was speeding up and would be the reason why the bear flew off.
 Next I made alterations to the lighting as currently this was not consistent with the following section, something else which made the join between the two visible. Firstly I selected the omni light which represented the sun and applied shadows. I also made the lighting consistent by changing the intensity of the light in front of him to 0.5.
To resolve this, the curve editor was opened and the end tangent was set to linear so that the rotation of the roundabout no longer eased out. I decided against making this adaptation to the beginning tangent as I felt the ease in worked well as it gave the impression that the roundabout was speeding up and would be the reason why the bear flew off.
 Next I made alterations to the lighting as currently this was not consistent with the following section, something else which made the join between the two visible. Firstly I selected the omni light which represented the sun and applied shadows. I also made the lighting consistent by changing the intensity of the light in front of him to 0.5.
Thursday, 9 April 2009
Easter Week 1-Creating ident 2 part 1
This is the final part of animation I need to complete before completing my project. To begin I imported the robot, bear, balloons and bag into the park scene. I then scaled them into proportion by setting the coordinates before positioning them in the scene. In this part of ident 2 the robot will be carrying the bear in the bag, so I positioned and scaled the robot followed by his bag. To get the bear to fit in the bag I did need to use the bones to reposition the limbs and scale him slightly further.
 When I was happy with the size of these objects I grouped them together. I then rescaled the timeline to 60 frames in length.
Next I turned on auto key to animate half of a step of the robots walk, this being the movement of his leg from behind him to in front of him. I did this as I planned to cycle the movement using the ping pong parameter out-of-range type as I felt this would work best as I would not need to align the start and end point. When animating I started with the upper leg and then modified the movement of the lower part.
 Afterwards I opened the curve editor and set the cycle to ping pong so that the steps were constant for each bone animated. I then repeated the process for the other leg.
 Next I used auto key again to set the start and end points for the walk so land was covered as his legs were moved. I then placed him in the scene exactly where I wanted him.
 At this point I watched the animation and felt he looked rigid as he walked. So I animated his arms as he walked. To do this I created the arm movement for half a step with auto key and then applied a ping pong cycle using the curve editor. I did this for the upper arm and then made his arm bend at different amounts by rotating the lower arm bone.
 After this I applied movement to his head as he walked to help to prevent this rigid look. For this I used the rotate tool and auto key to move his head from side to side.
 I then watched the animation and realised the robot moved too fast and it looked like he was skiing. To improve this I made the distance he travelled shorter.
I then set the shot using the target camera. I initially placed the camera so the shot only included robot and bench, but I felt this looked quite boring and as it would be the first part of this animation I wanted to set the scene. So I moved it away from the subject so it included some of the play equipment.
 Next I added omni lights to the scene. I set the move coordinates to place it in the same point of the scene as in other animations for this ident. I set the intensity to 1 and turned on the shadows. This left the subject quite dark and so I added a target spot light to highlight the subject and set the intensity to 0.4 so it lights the subject to a good level. This left a circle of light on the floor and so I turned on the far attenuation and set it between 80 and 600.
 I was quite happy with the animation at this point but felt the balloon in the backgrounds did not work as they were stationary throughout. I used auto key and the rotate tool to add animation to each balloon separately. To make it look as realistic as possible I tried to get them to sway in sink, but not to have their movements identical.
When doing this I found I needed to move the pivot points to the bottom of the string as the movement would come from the tied area. Finally I used the curve editor to identify big changes in movement and reduce these as they were only meant to be moving in a gentle breeze.
 When I was happy with the size of these objects I grouped them together. I then rescaled the timeline to 60 frames in length.
Next I turned on auto key to animate half of a step of the robots walk, this being the movement of his leg from behind him to in front of him. I did this as I planned to cycle the movement using the ping pong parameter out-of-range type as I felt this would work best as I would not need to align the start and end point. When animating I started with the upper leg and then modified the movement of the lower part.
 Afterwards I opened the curve editor and set the cycle to ping pong so that the steps were constant for each bone animated. I then repeated the process for the other leg.
 Next I used auto key again to set the start and end points for the walk so land was covered as his legs were moved. I then placed him in the scene exactly where I wanted him.
 At this point I watched the animation and felt he looked rigid as he walked. So I animated his arms as he walked. To do this I created the arm movement for half a step with auto key and then applied a ping pong cycle using the curve editor. I did this for the upper arm and then made his arm bend at different amounts by rotating the lower arm bone.
 After this I applied movement to his head as he walked to help to prevent this rigid look. For this I used the rotate tool and auto key to move his head from side to side.
 I then watched the animation and realised the robot moved too fast and it looked like he was skiing. To improve this I made the distance he travelled shorter.
 I then set the shot using the target camera. I initially placed the camera so the shot only included robot and bench, but I felt this looked quite boring and as it would be the first part of this animation I wanted to set the scene. So I moved it away from the subject so it included some of the play equipment.
 Next I added omni lights to the scene. I set the move coordinates to place it in the same point of the scene as in other animations for this ident. I set the intensity to 1 and turned on the shadows. This left the subject quite dark and so I added a target spot light to highlight the subject and set the intensity to 0.4 so it lights the subject to a good level. This left a circle of light on the floor and so I turned on the far attenuation and set it between 80 and 600.
 I was quite happy with the animation at this point but felt the balloon in the backgrounds did not work as they were stationary throughout. I used auto key and the rotate tool to add animation to each balloon separately. To make it look as realistic as possible I tried to get them to sway in sink, but not to have their movements identical.
When doing this I found I needed to move the pivot points to the bottom of the string as the movement would come from the tied area. Finally I used the curve editor to identify big changes in movement and reduce these as they were only meant to be moving in a gentle breeze.
Wednesday, 8 April 2009
Easter-Completing ident 1 part 1
At this point there was basic animation of all the necessary elements in the scene. The animation of the robots leg was only partly complete and so this was the first thing I worked on.
Currently I had one complete cycle of the robot pushing on the ground so I opened the curve editor and applied a cycle to the current animation of each bone in the leg used to create the propelling motion throughout the animation. I also edited some of the points along the curve to improve the animations movement, this being raising vertex points to make the movement more evident. The result of this was that this part of the animation was much improved.
 Next I added a target camera to the scene and positioned it so that the roundabout and characters were central in the shot. I managed to get some of the playground equipment in the background included as well and so I was pleased with this.
Then I added lighting to the scene starting with an omni light. I put this in the same location as I had previously used for this part of the scene and set the intensity to 1 with shadows to try to make the lighting consistent.
 With just this light in the scene I felt it was too dark and so I added a target spot light to highlight the roundabout, robot and Ted as these are the focus of the animation. I positioned the light so it pointed towards the subjects and set the intensity to 0.5 which I felt was a good level of lighting.
 I was reasonably pleased with the lighting at this point, but did not like the evident light ring produced from the target spot light. To resolve this I turned on the far attenuation and set the range between 140 and 200. There was still a slight patch of light evident, but I was unable to remove this without making the subject darker.
 The final alteration I made was to the move of the roundabout group. When I watched it I noticed there was a period of easing in and out at the beginning and end which would not be suitable. I used the curve editor to set the end point to speed up. This worked well with the preset of ease in and so I am happy with this.
Currently I had one complete cycle of the robot pushing on the ground so I opened the curve editor and applied a cycle to the current animation of each bone in the leg used to create the propelling motion throughout the animation. I also edited some of the points along the curve to improve the animations movement, this being raising vertex points to make the movement more evident. The result of this was that this part of the animation was much improved.
 Next I added a target camera to the scene and positioned it so that the roundabout and characters were central in the shot. I managed to get some of the playground equipment in the background included as well and so I was pleased with this.
Then I added lighting to the scene starting with an omni light. I put this in the same location as I had previously used for this part of the scene and set the intensity to 1 with shadows to try to make the lighting consistent.
 With just this light in the scene I felt it was too dark and so I added a target spot light to highlight the roundabout, robot and Ted as these are the focus of the animation. I positioned the light so it pointed towards the subjects and set the intensity to 0.5 which I felt was a good level of lighting.
 I was reasonably pleased with the lighting at this point, but did not like the evident light ring produced from the target spot light. To resolve this I turned on the far attenuation and set the range between 140 and 200. There was still a slight patch of light evident, but I was unable to remove this without making the subject darker.
 The final alteration I made was to the move of the roundabout group. When I watched it I noticed there was a period of easing in and out at the beginning and end which would not be suitable. I used the curve editor to set the end point to speed up. This worked well with the preset of ease in and so I am happy with this.
Sunday, 5 April 2009
Week 9-Starting ident 1 part 1
I have left this part of the ident until now as I felt the animation was more complicated than many of the others and so I could develop my animation skills before I came to this. To begin I imported Ted and the robot into the file with all the apparatus laid out. I then scaled them down so they were roughly in proportion to the rest of the scene.
Then I placed the bear on one of the roundabout seats. I then opened the scale coordinates window and changed these slightly to perfect the shape. I used the same coordinates as I had previously so that the bear was the same size in this part of the animation as in previous parts.
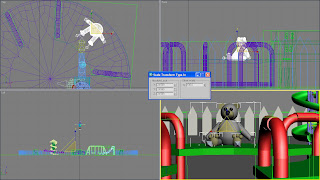 I then repeated this process to perfect the robots proportions.
Next I used the bones to position the robots limbs where they would be for the first frame of the animation. To start I applied a bend at the knees and hips so the character would be low enough for one foot to reach the floor ready to start to propel the roundabout. I also moved the bones in the arms so they reach forward so it would appear the robot was holding on to the handlebar in front.
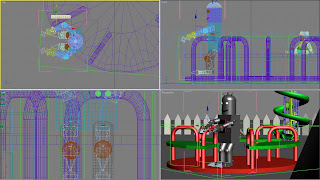 I then used the move and rotate tools to move the robot into place ready to start the animation before rescaling the timeline to 75 frames in length. Lastly I selected the bear, roundabout and robot and grouped the items.
Next I turned on auto key and applied a rotation to the grouped objects between the first and last frame.
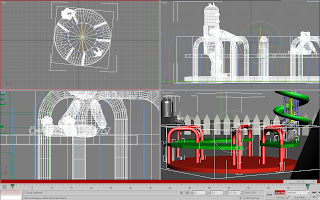 Then I opened the group so I could animate the robots outer leg. Before I started to animate this I repositioned the bones of the outer leg so it was closer to the ground.
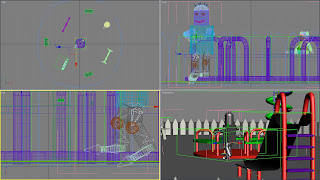 I wanted to give the impression that the robot was propelling the roundabout and so selected the auto key and animated the leg bones. I began by applying a rotation to the ankle bone, but this was not enough and so looked unrealistic. As a result I also animated the movement of the upper leg and calf bones as well, also using the rotate tool. This made the push of the foot look much more realistic and so I was pleased with this.
Then I placed the bear on one of the roundabout seats. I then opened the scale coordinates window and changed these slightly to perfect the shape. I used the same coordinates as I had previously so that the bear was the same size in this part of the animation as in previous parts.
 I then repeated this process to perfect the robots proportions.
Next I used the bones to position the robots limbs where they would be for the first frame of the animation. To start I applied a bend at the knees and hips so the character would be low enough for one foot to reach the floor ready to start to propel the roundabout. I also moved the bones in the arms so they reach forward so it would appear the robot was holding on to the handlebar in front.
 I then used the move and rotate tools to move the robot into place ready to start the animation before rescaling the timeline to 75 frames in length. Lastly I selected the bear, roundabout and robot and grouped the items.
Next I turned on auto key and applied a rotation to the grouped objects between the first and last frame.
 Then I opened the group so I could animate the robots outer leg. Before I started to animate this I repositioned the bones of the outer leg so it was closer to the ground.
 I wanted to give the impression that the robot was propelling the roundabout and so selected the auto key and animated the leg bones. I began by applying a rotation to the ankle bone, but this was not enough and so looked unrealistic. As a result I also animated the movement of the upper leg and calf bones as well, also using the rotate tool. This made the push of the foot look much more realistic and so I was pleased with this.
Week 9-Adding the logo to ident 1
So far the animation in the final part of ident 1 was complete and all that was needed was for the logo to be added. So to begin I imported the logo into the scene.
When created the letters were written horizontally, but the plan for this ident was for them to run downwards as it was felt this would work better with the helter-skelter which is the main part of the scene.
 Next I spaced the letters out evenly as they went down the helter-skelter. I felt it would work best if each letter was placed between a part of the slide as this would prevent parts not being visible where the two intercepted. I then carefully placed the logo so it faced the camera and was level with the central column of the helter-skelter.
 Afterwards I went to the first frame of the animation and was disappointed that the edge of the logo was visible in the shot. Leaving this would ruin the whole of the ident as the seam between this and the previous section would be visible as the start and end points were exactly the same. As a result the camera position could not be altered and therefore the only option was to move the logo.
 The logo was currently positioned where I wanted it and so I animated the logos movement into the shot during the first few frames before the camera moved out too far and this movement was visible. To do this I used the auto key. Firstly I set the final positions of the animation before I positioned the first as these positions where ready. At frame 1 I moved the logo side wards away from the bear just enough that it was out of shot at the beginning of this part.
When created the letters were written horizontally, but the plan for this ident was for them to run downwards as it was felt this would work better with the helter-skelter which is the main part of the scene.
 Next I spaced the letters out evenly as they went down the helter-skelter. I felt it would work best if each letter was placed between a part of the slide as this would prevent parts not being visible where the two intercepted. I then carefully placed the logo so it faced the camera and was level with the central column of the helter-skelter.
 Afterwards I went to the first frame of the animation and was disappointed that the edge of the logo was visible in the shot. Leaving this would ruin the whole of the ident as the seam between this and the previous section would be visible as the start and end points were exactly the same. As a result the camera position could not be altered and therefore the only option was to move the logo.
 The logo was currently positioned where I wanted it and so I animated the logos movement into the shot during the first few frames before the camera moved out too far and this movement was visible. To do this I used the auto key. Firstly I set the final positions of the animation before I positioned the first as these positions where ready. At frame 1 I moved the logo side wards away from the bear just enough that it was out of shot at the beginning of this part.
Subscribe to:
Comments (Atom)
